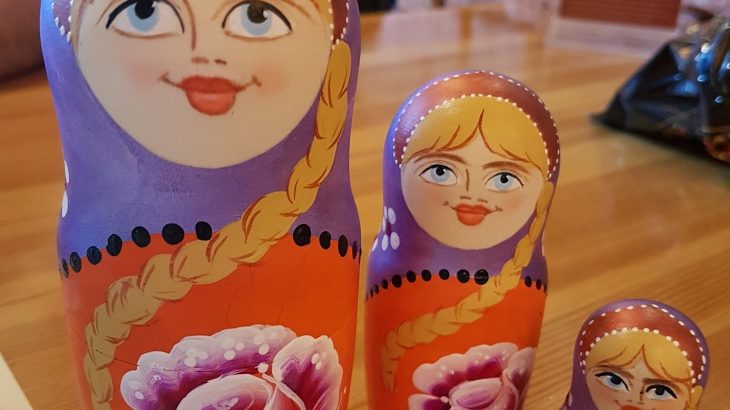
Matryoshka dolls are a typical souvenir from Russia and with so many different colour combinations and themes it’s difficult to pick out that unique set to take home.
These beautiful dolls are sold everywhere in Russia, so it’s important to consider the mass produced ones versus the hand painted creations. Some of the themes include favourite Disney characters and even footballers, very apt with the World Cup in Russia this year. The traditional classic colours tend to be yellow and red.
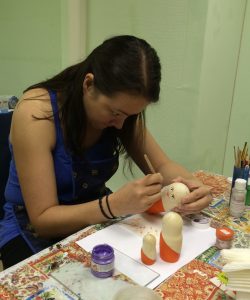
Local art and crafts and any chance to get creative on my travels always get me a little bit excited, so of course I went in search of somewhere to paint Matryoshka dolls when I was in St Petersburg last month.
Matryoshka Masterclass is run by Elena who offers classes daily where you can learn how to paint Matryoshka Russian dolls. Paint and decorate your own unique Matryoshka doll or set of 3 dolls. Of course I wanted to create a matching set so anticipated it would take a little longer than the advertised 2 hours.
Whilst Phill went off to visit more of the Hermitage museum; I’d already spent a day there. I sneaked off to do something creative, which was a lovely way to end my time in this beautiful city.
Matryoshka doll painting
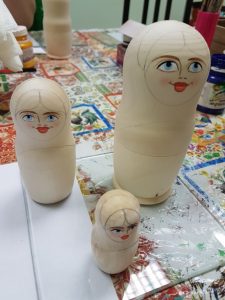
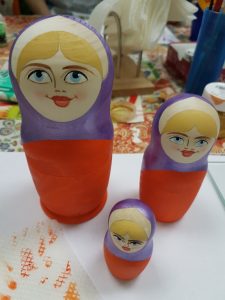
Fortunately the dolls come ready painted with faces, as I’m sure this would have been the hardest bit with such tiny details. So to start, I only had to pick a set with either brown out blue eyes and select the 2 basic colours.
Base
Starting with the outline, is definitely a good way to get the hang of the texture of the paint. The guidelines make it fairly easy to brush on the chosen colours either side of the pencil lines indicating the edge of the dress/shawl.
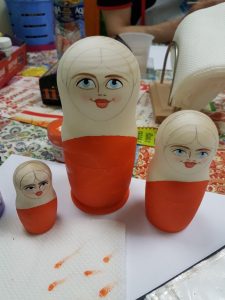
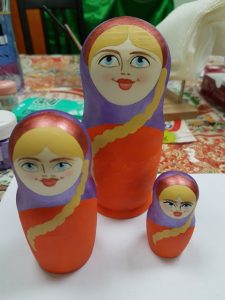
The painting does get slightly harder as you move from the larger doll to the medium one and then the baby. Repeating the colours on each. After the base is complete it’s time to work on the the front of the headdress which starts to get fiddly, particularly if you choose to adapt the design to one of the non standard options. I just added a point to the headdress and kept it simple, but making it symmetrical was challenging enough.
Features
Next, choosing one plait or two is a difficult decision. I opted for just the one, as wasn’t sure how balanced my freehand brush strokes would be at plaiting pig tails.
As time pushed on I was tasked with dotting on blobs of paint to create delicate flowers. Then more dots to decorate further and some help from Elena with the featured flowers. More dots followed and then a bit of blow drying, both the paint and then the varnish.
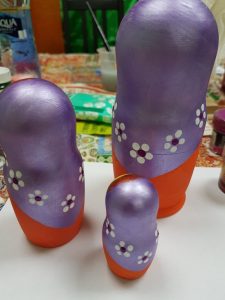
The hardest part is choosing the colours, not only for the dress and shawl but for the flowers and dots. Elena keeps the instructions simple so it’s fairly easy to just keep painting stage by stage, remembering you have to do each bit 3 times, if you are completing a set.
The class was small, just 5 of us, a mum and young son, plus a dad and his teenage daughter. All were Russian speakers, although I suspect at least one spoke some reasonable English, but the concentration on the painting didn’t allow much time for breaking the language barrier.
A wonderful experience and great souvenir. The more I get creative on my travels the more I want to travel for these sorts of experiences.


